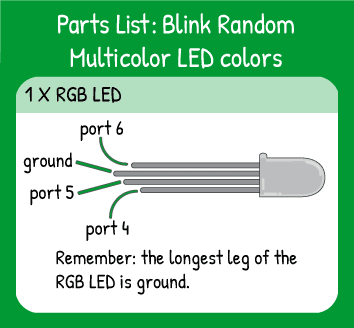
Blink Random Multi-Color LED Colors
Step 1 - Build the Project
Using random() can make code more interesting. Here you’re using random to decide which LEDs are illuminated in each loop.
Step 2 - Upload the Code
Step 3 - Read the Walkthrough
First, you define the pins you’re using for the LEDs as outputs so that more current can flow to them when you digitalWrite them HIGH.
Next, you will create three variables of the byte type. Name them something that is simple but not too easily confused with a pin number. For the values assigned to them, use the random() command, which is built into the Arduino software. You can read up on the random() command, but in this code, the number in the parentheses is one greater than the maximum number it will generate. In other words, using the number 2 will generate either a 0 or a 1.
Next you will use that 0 or 1 within digitalWrite() to turn an LED on or off. digitalWrite() can use the 1 to write HIGH on the pin or it can use the 0 to write LOW on the pin. These commands are totally equivalent, but we default to using HIGH or LOW because it’s easier to see and less confusing with the pin number.
Because the variables get a new value for each loop, the random flashing will continue forever.


