
Morse Code with Sound and Light
Step 1 - Build the Project
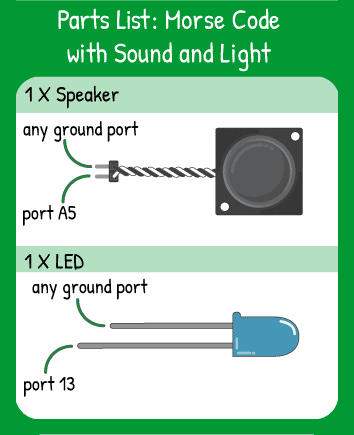
If you understand the earlier project that used Morse code and LEDs or the project that used Morse code and a speaker, you’ll see that this project is similar, but you are combining the digitalWrite commands for the LED with the tone commands for the speaker.
Step 2 - Upload the Code
Step 3 - Read the Walkthrough
To create Morse code with sound and light, you first need to convert ASCII code to Morse code, then Morse code to tone commands and digitalWrite commands.
First, we create a list of values called an array. The message array holds the characters you’d like to convert to Morse code. The rest of the code can access these letters with a command like: “Go get the 10th thing in the array” and the code will fetch the 10th item in the array.
Second, we create another array. This array- named morse- holds the dot/dash code for each number and letter of the alphabet.
Next you’ll create your variables for your speaker pin, LED pin, and how long dots, dashes, and spaces should take.
The next chunk of code is a function. It is a group of code that always runs together. These are a little bit like a variable, in that you create it, name it, and give it a value (a series of tasks to do). This function is designed to take in dots and dashes and convert them to tone and digitalWrite commands. It checks the Morse character and uses your dotLen and dashLen variables to determine how long to blast the tone from the speaker. Because both the tone and digitalWrite commands use the model “on, wait, off”, placing the commands right next to each other will work perfectly.
In this code, the loop() section is taking in the text characters from the message array, making them uppercase, and converting the ASCII number to the Morse number. Then, it passes the morse array number to signalMorse and says “Here, take this number and do your job with it”. The i++ at the bottom of the loop then moves the loop on to the next character in the array.
The signalMorse number receives the morse array number, which contains dashes and dots. Its job is to unpack the morse array into dashes and dots and then turn on the tone and LED for the duration of those dashes and dots. By the time it is done beeping and flashing out the character, signalMorse is ready to receive another morse array number from the loop!
