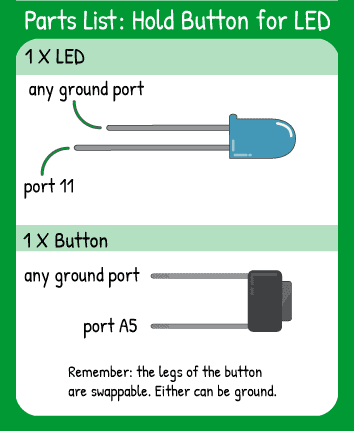
Hold Button To Turn LED On
Step 1 - Build the Project
This code ties two conditions together- the button’s condition is directly related to the LED’s condition. Because each of them is using only digital logic, there are only two condition (HIGH or LOW) for the button and for the LED.
Step 2 - Upload the Code
Step 3 - Read the Walkthrough
Because the pushbutton is setup as an INPUT_PULLUP, it will digitalRead LOW when it is pressed. To make the light illuminate when the button is pressed, you need to tie digitalRead LOW to digitalWrite HIGH in the ‘if’ statement.
The else statement says “If the ‘if’ statement isn’t true, do this section of code.” Because the button can only be pressed or unpressed, the else is very straightforward.
It looks like this code isn’t doing much when you use it, but remember that the loop is being run hundreds of times a minute, so the reaction to the button press will be very fast!


