
Serial Print TempERATURE Readings
Step 1 - Build the Project
Temperature is not only useful data, but you can display it in lots of interesting ways. There are a few tricks to the temperature sensor, but once you get the hang of it, you'll have no trouble using it.
Step 2 - Upload the Code
Step 3 - Read the Walkthrough
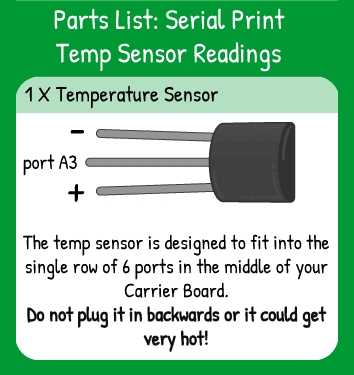
Important: the temperature sensor is one of the few sensors that can get hot and be ruined if you plug it in backwards. It doesn't take long to get hot and it can really hurt your fingers. Always double check that you're plugging this component in correctly.
In the setup portion of your program, you can set the center pin as an INPUT.
Start the serial communication with Serial.begin(9600). The 9600 is the communication speed- use 9600 unless you have a reason to use anything else.
You must convert the temperature sensor's voltage reading into a temperature value for it to be very useful to you. The actual temperature will be represented with a float variable tempF. To get a temperature from the analogRead(A3), you multiply it by 0.88 and then subtract 58.0. There is no simple explanation why you use these particular numbers, but you shouldn't experiment much with them- you'll get some weird readings!
Now that you have a temperature value, you can print it to the serial port. The loop will print the line "TempF: " and then on the same line it will print the variable value. Your second Serial.println command stands for 'print line', so the serial monitor will create a new line after the variable value is printed.
After you have uploaded your code, press the magnifying glass icon in the upper right-hand side of the Arduino software window with Maker Board still connected to the USB port.
A new window will pop up and values should start immediately streaming in. You can lightly squeeze the sensor or breathe on it to get the temperature to see a change in the readings.
