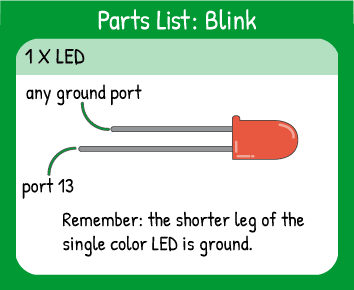
Use these virtual cards to find out which parts you'll need and where to plug them into your Carrier Board.
Topics Covered:
The blink program uses the LED (light-emitting diode) built into Maker Board to flash on and off. To do that, you need to tell Maker Board that the LED is an OUTPUT that should be turned on (HIGH) and off (LOW) with a pause between each command.
Read the Code Walkthrough Text (click to open)
New Concept: Loops
Almost every program you write will use loops, or repeating statements. Computers don't get bored or distracted, so they can run the same code over and over with no trouble. Depending on what type of loop you use, you can have something repeat forever, a set number of times, or only while something else is causing the loop to occur (like a button press).
You'll see in later lessons what types of loops are available and how to use them together so that you can control the repetition of many different parts of the same program.
New Concept: Functions with Arguments
Functions are everywhere in programming. They're basically groups of code that run together. Some functions take in information, change it, and spit out something different. For example, imagine an equation (x+2). If you say x = 2, then the result will be 4. If you say x = 1, the result will be 3. That is a tiny function that takes in information and modifies it.
Some functions are built-in to the programming environment you use, so you won't see exactly how they work. That's a good thing, because it means a previous developer has hidden lots of complexity so you don't have to deal with it.
When you have to give information to a function for it to work, the information you give it is an argument. The required arguments for a function are designed by the person who coded the function, so you can't change what the arguments are without changing the function itself.
For example, pinMode() needs two arguments: pin number and OUTPUT, INPUT, or INPUT_PULLUP. Even if you want to set pins 10 and 11 as OUTPUTs, that's not allowed by the function- it can only use two arguments.
When you see a new function, it's good to learn what arguments it requires and what output, if any, it will have.
Quiz Yourself!
The example code above used these concepts and techniques. Try to answer these questions so you know you're ready to move on. If you have trouble, try to run a program that helps you find the answer. For example, you can run the example code and count how many times the LED blinks.1. How many times will the LED blink if you let the example code run?
2. If you make the value of both delays smaller, what will happen?
3. In the example digitalWrite(13,HIGH);, what are the arguments?


